RoboHelp 2019 - The Table of Contents
This topic covers the full Table of Contents. See RoboHelp 2019 - Miscellaneous for in topic Mini TOCs.
 Now you can automatically keep your TOC page titles in sync with your topic titles. See below.
The TOC Controls Your Outputs
There is a big change in what goes into an output in RoboHelp 2019. In earlier versions, an output contained everything that was in Project Manager that was not excluded by the build expression. In RoboHelp 2019 it is controlled by the table of contents.
Every topic that you want in the output must be in the TOC or have a link from a topic that is in the TOC.
You may not want users to see a TOC with every topic that can be accessed, some you may just want to be links from other topics. Not every topic has to be included in the TOC.
- Topics with links from other topics or the index will be included whether or not they are in the TOC.
- Topics that you do not want users to see in the TOC and that do not have links from other topics or the index must be included. There is a check box to hide such items in the TOC that the user sees. Baggage files are included in this way as described below.
Let's say you have a topic that has links to say twenty others that give supplementary information. Only that one topic needs to be in the TOC as the links will automatically pull in the twenty supplementary topics. That does not prevent you from including any or all of the twenty, it's just that you don't have to.
Baggage Files
Because the TOC controls what goes into an output, you also use it to add baggage files to the output. Baggage files are files you want in the build when you generate but that are not referenced anywhere.
When you click Insert Pages while editing a TOC, as shown below in Adding Items to the TOC, there will be an option Local Files. Select the baggage file you want to add and it will be uploaded when you generate. If you don't want the baggage file to appear in the TOC, just tick Hide in Output in the Properties panel.
Using the TOC
Click Table of Contents in the Project Toolbar. If you have multiple TOCs, when you expand one of them, the others are temporarily hidden so that you can focus on the open TOC. As soon as you collapse a TOC, the others will be displayed again.
You can work on the TOC in the TOC pane or you can open it in the authoring area.
You can duplicate an existing TOC as the base for a new TOC and you can copy/cut/ paste items between TOCs.
 Editing the TOC in the TOC pane on the left and editing in the authoring area have an important difference.
- In the TOC panel any changes made there are autosaved and you will see the changes mirrored in the authoring area if you also have the TOC open there. There are two ways to reverse any changes made in the TOC pane. The quickest way if you have made many changes is to click in the panel and keep using CTRL Z until you get back to where you want to be. You can also right click and use the Undo and Redo options in the context menu.
- In the authoring area changes are not autosaved. As you make changes, an asterisk will display in the tab to show there are unsaved changes. The changes will only show in the TOC panel when you save the changes.
Working in the TOC Pane
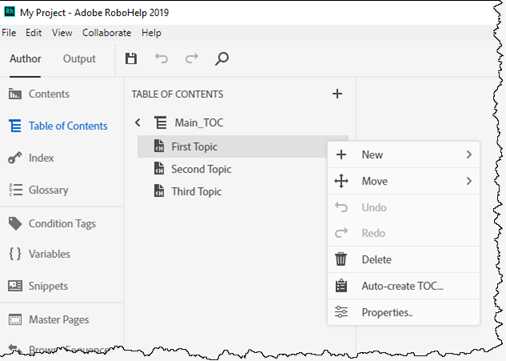
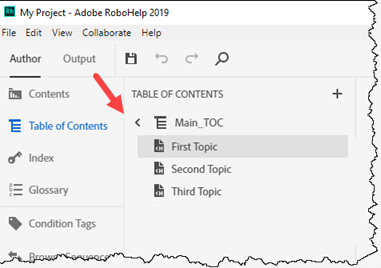
Click the twisty to see the contents of the menu and right click any item to see the editing options.

Working in the Authoring Area
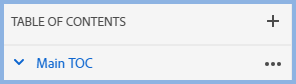
If you prefer to edit in the authoring area, contract the menu using the twisty that is on the left in an expanded menu. Hover over the menu to see a menu icon and select Edit or double click the TOC name.
The TOC will open in the authoring area to the right and the standard toolbar will display the necessary options. The TOC Properties will be displayed in the Right Panel.
Adding Items to the TOC
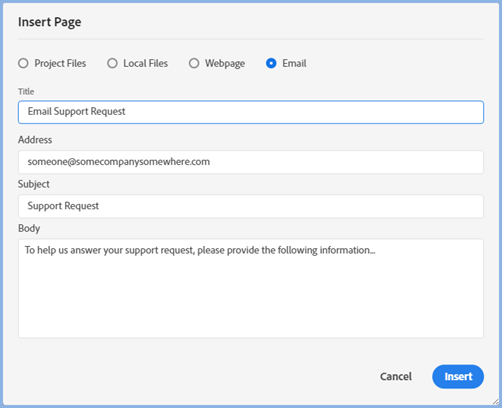
Click New Page to display this dialog.
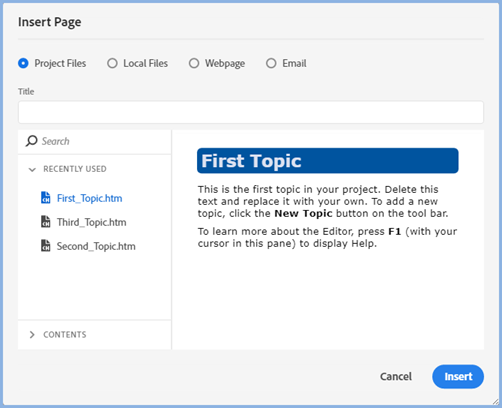
Note the options. You can add Project Files, Local Files outside your project (Baggage Files), links to Web Pages and create draft emails for your users.
Creating emails is new. The title will appear in the TOC. Clicking that page will open the email in the users default email program.
TOC Page Titles In Sync With Topic Titles
When you add a topic to your TOC it defaults to using the topic title. Change the topic title and the TOC will automatically sync with the new title. This will not override a page title you enter into the TOC.
How does this work?
Within the RoboHelp internal files, the page title is left empty by default. If you do not manually enter a string RoboHelp will display the TOC title as the page title.
When you generate an output, RoboHelp will check the internal file to see if the TOC page title is empty and if it is, it will use the topic title. If you have entered a string though, that will take priority and be used.
I entered a string but now I want the two in sync.
In the TOC, delete what you entered and click Apply.
Does this work in projects upgraded from earlier versions?
Yes. During the upgrade RoboHelp compares the TOC page title with the topic title. If they are the same, internally the TOC page title will be empty and work the same way as in a new project. If they differ, the TOC page title will use your original title.
Broken Links
Red Xs will show against any item in the TOC where the link is broken.
Donations
If you find the information and tutorials on my site save you time figuring it out for yourself and help improve what you produce, please consider making a small donation.