Bits and Pieces
For those things that don't warrant a topic of their own but are still important.
Auto Save
With Update 10 applied, in Preferences you can now set an Auto Save interval.
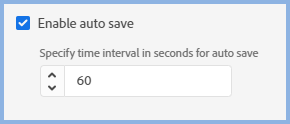
RoboHelp will auto save at the specified interval. Whilst the topic remains open in the authoring area, you can use Undo/Redo or CTRL Z/CTRL Y through all the autosaves made in that session. Once the topic is closed, the changes are committed.
You can also use Undo/Redo or CTRL Z/CTRL Y with Auto Save deselected whilst a topic is open even though you have saved.
In all cases, once you have closed the topic, the undo options are no longer available.
Colours
Colours can be set for fonts, borders, backgrounds and so on, anywhere you see this option.

Click the highlighted area to display the swatch shown below in a new project. In a project upgraded from a Classic version you will see the colours that were defined in that project.
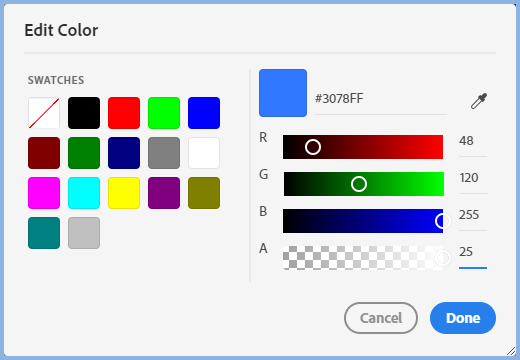
Use the sliders to adjust or set a colour. As you do so, the RGB values will change. Use the A setting to adjust the opacity of the colour.
Alternatively, click and release the eye dropper, then move the mouse to select whatever colour is picked up by the cross hairs. These will be surrounded by a large circle displaying the colour that will be defined when you click again.
New colours can be added to the swatch from Project Settings.
To close the swatch dialog, click outside the area or press the Escape key.
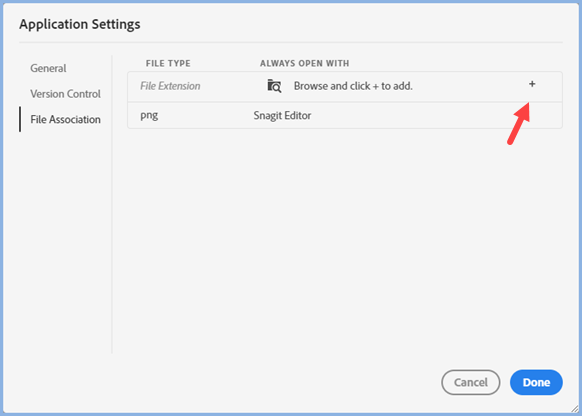
File Association
With Update 5 applied, you can associate various file types with your preferred editor.
Click Edit > Preferences and then File Association.
Enter the file extension and then browse the exe file of your preferred editor, then click the + icon to see that in the row below.
Click Done when you have added the required editors.
Hyperlinks
When you add a link in a topic using the Link icon, you can add a screen tip to give the user more information. If you drag topics to create a link in another topic, right click the link to add the screen tip.
Right click a hyperlink to edit it or open the target.
Keyboard Shortcuts
With each update more and more keyboard shortcuts are being added. See the RoboHelp's online help for the current shortcuts.
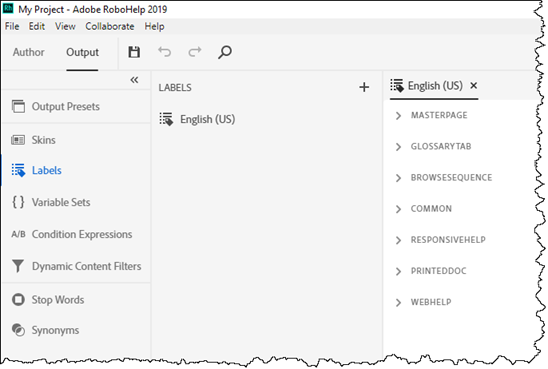
Language File
The LNG file as it was originally known allowed you to make many changes to terms the end user sees. Later it was renamed Labels but it was still deep in the Project Settings. Now Labels are easily found in Output Presets.
Hover over an existing set to edit or delete it.
 Now you can import and export sets between projects. Great news for anyone who works with multiple languages as that can save on costs.
Mini TOCs
In your longer topics, you can add a mini TOC listing the headings in that topic. You can also insert a mini TOC into a Master Page.
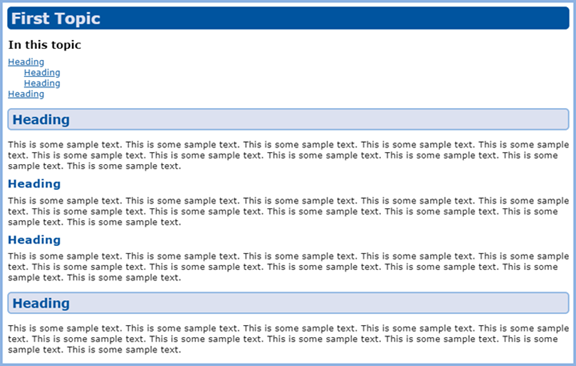
Place the cursor where you want the mini TOC and click the icon shown.

In the author view it will look like this with some formatting applied. In this example, it has been set to show up to six levels of heading.
 If you see something different with Update 7 applied, see RoboHelp 2019 on my main site.
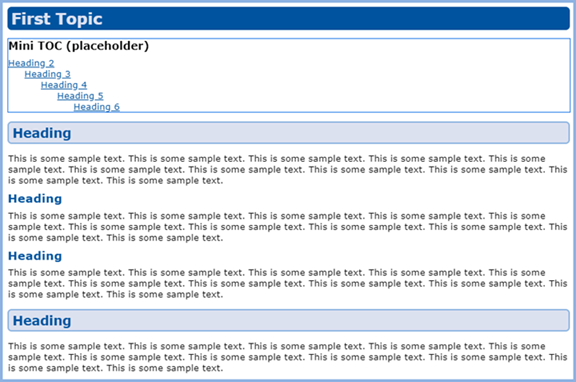
In the preview, it will look like this. In this topic there are only two headings.
Formatting the Mini TOC Caption
Click in the placeholder line and go to Properties. Here you can define the caption users will see, with different captions dependent on whether the list is expanded or contracted if you choose that option. You can also change the font as required.
Formatting the Mini TOC Links
To change the default appearance of the list of topics, click next to list and go to Properties > Styles > Lists.
Select one of your pre-existing list styles or create a new one with a name such as minitoc-list-item to clearly identify its purpose. To change the appearance of that list style, click the pencil icon alongside to open the CSS editor. Set the appearance for each level.
At the moment, you can only apply one font style, color, size and weight to the whole list.
Multiple Columns
With Update 6 applied, content can be created in multiple columns.
Click any style in the CSS editor and you will see a new group, Multiple Columns. You can set that for the body tag so that all content is in the number of columns you set or you can set it for specific styles. That would allow you to have, for example, a heading that is full width but the styles set for the content to be display in two columns.

Paragraph Markers
Technically "pilcrows". If you want to see your paragraph markers, go to View > Show > Paragraph Markers to toggle them on or off.
Resource Linking
Resource Manager has been replaced by Resource Linking.
Rounded Corners
With Update 5 applied, when applying a border or a background colour in the style editor you can now set a radius so that the corners are rounded rather than square. The setting is in the Border options but applies to both border and background.
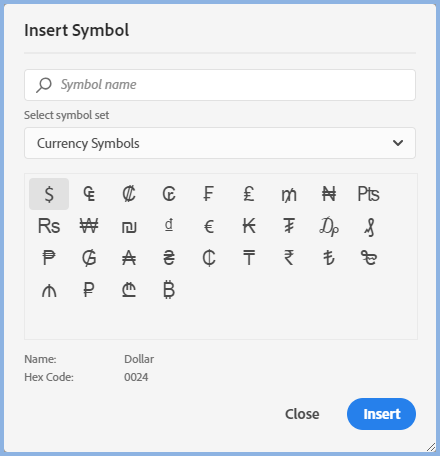
Special Characters
With Update 8 applied, a toolbar icon accesses a dialog with categories of special characters to make it easier to find and insert a wide range of special characters.

Spell Check
Click Edit > Spell Check to see the options for spell checking along with their keyboard shortcuts. The spell check panel appears alongside Properties.
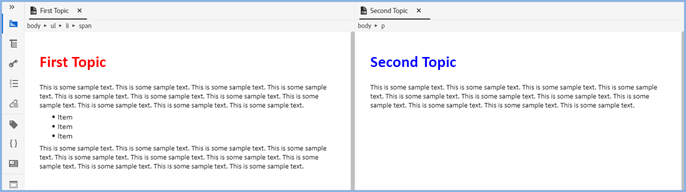
Split View
Right click a tab for any topic and various split screen options will be shown. That topic will be displayed top, bottom, left or right according to you choice and all others will opposite. If you need more screen space, hide the other panels.
Stop Words
Stop Word have been moved, they are now in Output Presets.
Simply select a language and edit the supplied list.
When you generate an output, the language you choose for the output will use the appropriate list.
Synonyms
Synonyms have been moved, they are now in Output Presets.
Synonyms are a useful way of allowing your users to enter say car and find any topic with the word automobile in it.
Simply select a language and create your synonyms for that language.
When you generate an output, the language you choose for the output will use the appropriate list.
Underscores in File Names
For folders and topics in particular, it is recommended that you avoid spaces in the names. In Project Settings there is now an option so that underscores are automatically added if you enter a space.
This does not affect images to avoid issues with linked resources where you cannot control the naming convention.
Donations
If you find the information and tutorials on my site save you time figuring it out for yourself and help improve what you produce, please consider making a small donation.