Microsoft HTML Output - CHM
Notwithstanding its age, this format refuses to die. It is still popular where the help has to accessible offline and contained in a single file.
 CHM files do not understand CSS3 standards so a copy of the css used is converted to CSS2 on the fly. This may mean the output is not exactly as designed.
Creating a CHM
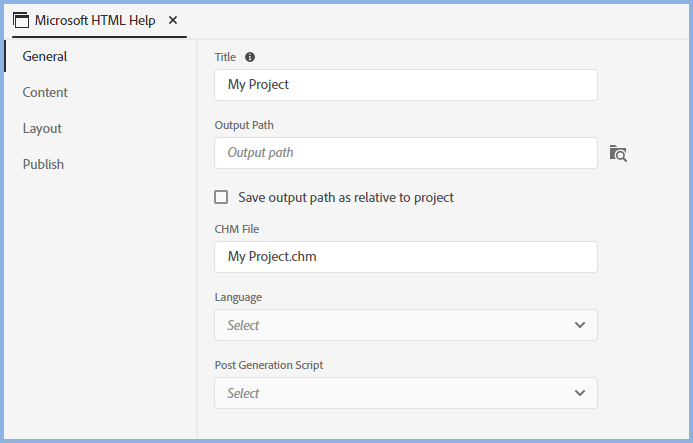
Output Path
By default the Output path will be created as an absolute path but you can choose to create a relative path.
Select or deselect the Save Output Path As Relative To Project to change the setting. Adobe RoboHelp will open Explorer to the current folder where you can either click Save Folder to retain the same path or browse to somewhere else.
- If you are a lone author always working on the same machine, you can choose either but the absolute option is recommended so that you can see exactly where the output will be saved.
- If there are multiple authors and/or you work on more than one machine in a non source controlled environment, then the relative path option may suit you better.
This will enable each author to generate to different folders as long as the same relative relationship is maintained. - The relative path option will work better if a project will be worked on using both Windows and Mac machines.
Whilst you can create a Publish Location for this output, CHM files cannot be run from a server and this option should not be used for that purpose. Typically it will be used to deliver it to developers. How this is set up is described in Publishing.
Windows
To create or edit the window for Microsoft HTML Help (CHMs), click Outputs and select Window Settings.
Existing windows will be listed and you can create new ones by clicking the + icon.
Double click a window shown in the Project Component Panel to edit it or hover over it and click the menu icon that will be displayed.
You will then see the various settings that can be applied. Please refer to the Adobe RoboHelp online help for details.

If you also create other help outputs and your developers use an API with a window defined, settings for other outputs will be added later.
Section (Book) and Topic Icons
By default all sections will have a book icon and all topics will have a page icon. In Project Settings you can enable Advanced HTML Help Options, then in the TOC you can define section and topic specific icons.
Generating the Output
Once you have defined the preset, click the generate icon.
Cancelling Generation
While an output is being generated, you can click the Cancel icon at any time.
Generation Errors
When you generate an output using Quick Generate, if it fails for any reason click the Error icon to access the log.

If you generated directly from the preset, you will get an error message. Right click the preset and click View Log.
Search Not Working?
Some users have reported that after generation the search tab is present but does not give any results. This and other issues can be caused by incorrect registration of the DLLs.
First try MJ's Diagnostics - Helpware Wiki - KB (helpwaregroup.com). That will report any missing DLLs and there is an option to re-register them.
You may also need to reinstall the Microsoft Help Compiler. That is no longer available from Microsoft it can be downloaded from the Web Archive.
Donations
If you find the information and tutorials on my site save you time figuring it out for yourself and help improve what you produce, please consider making a small donation.